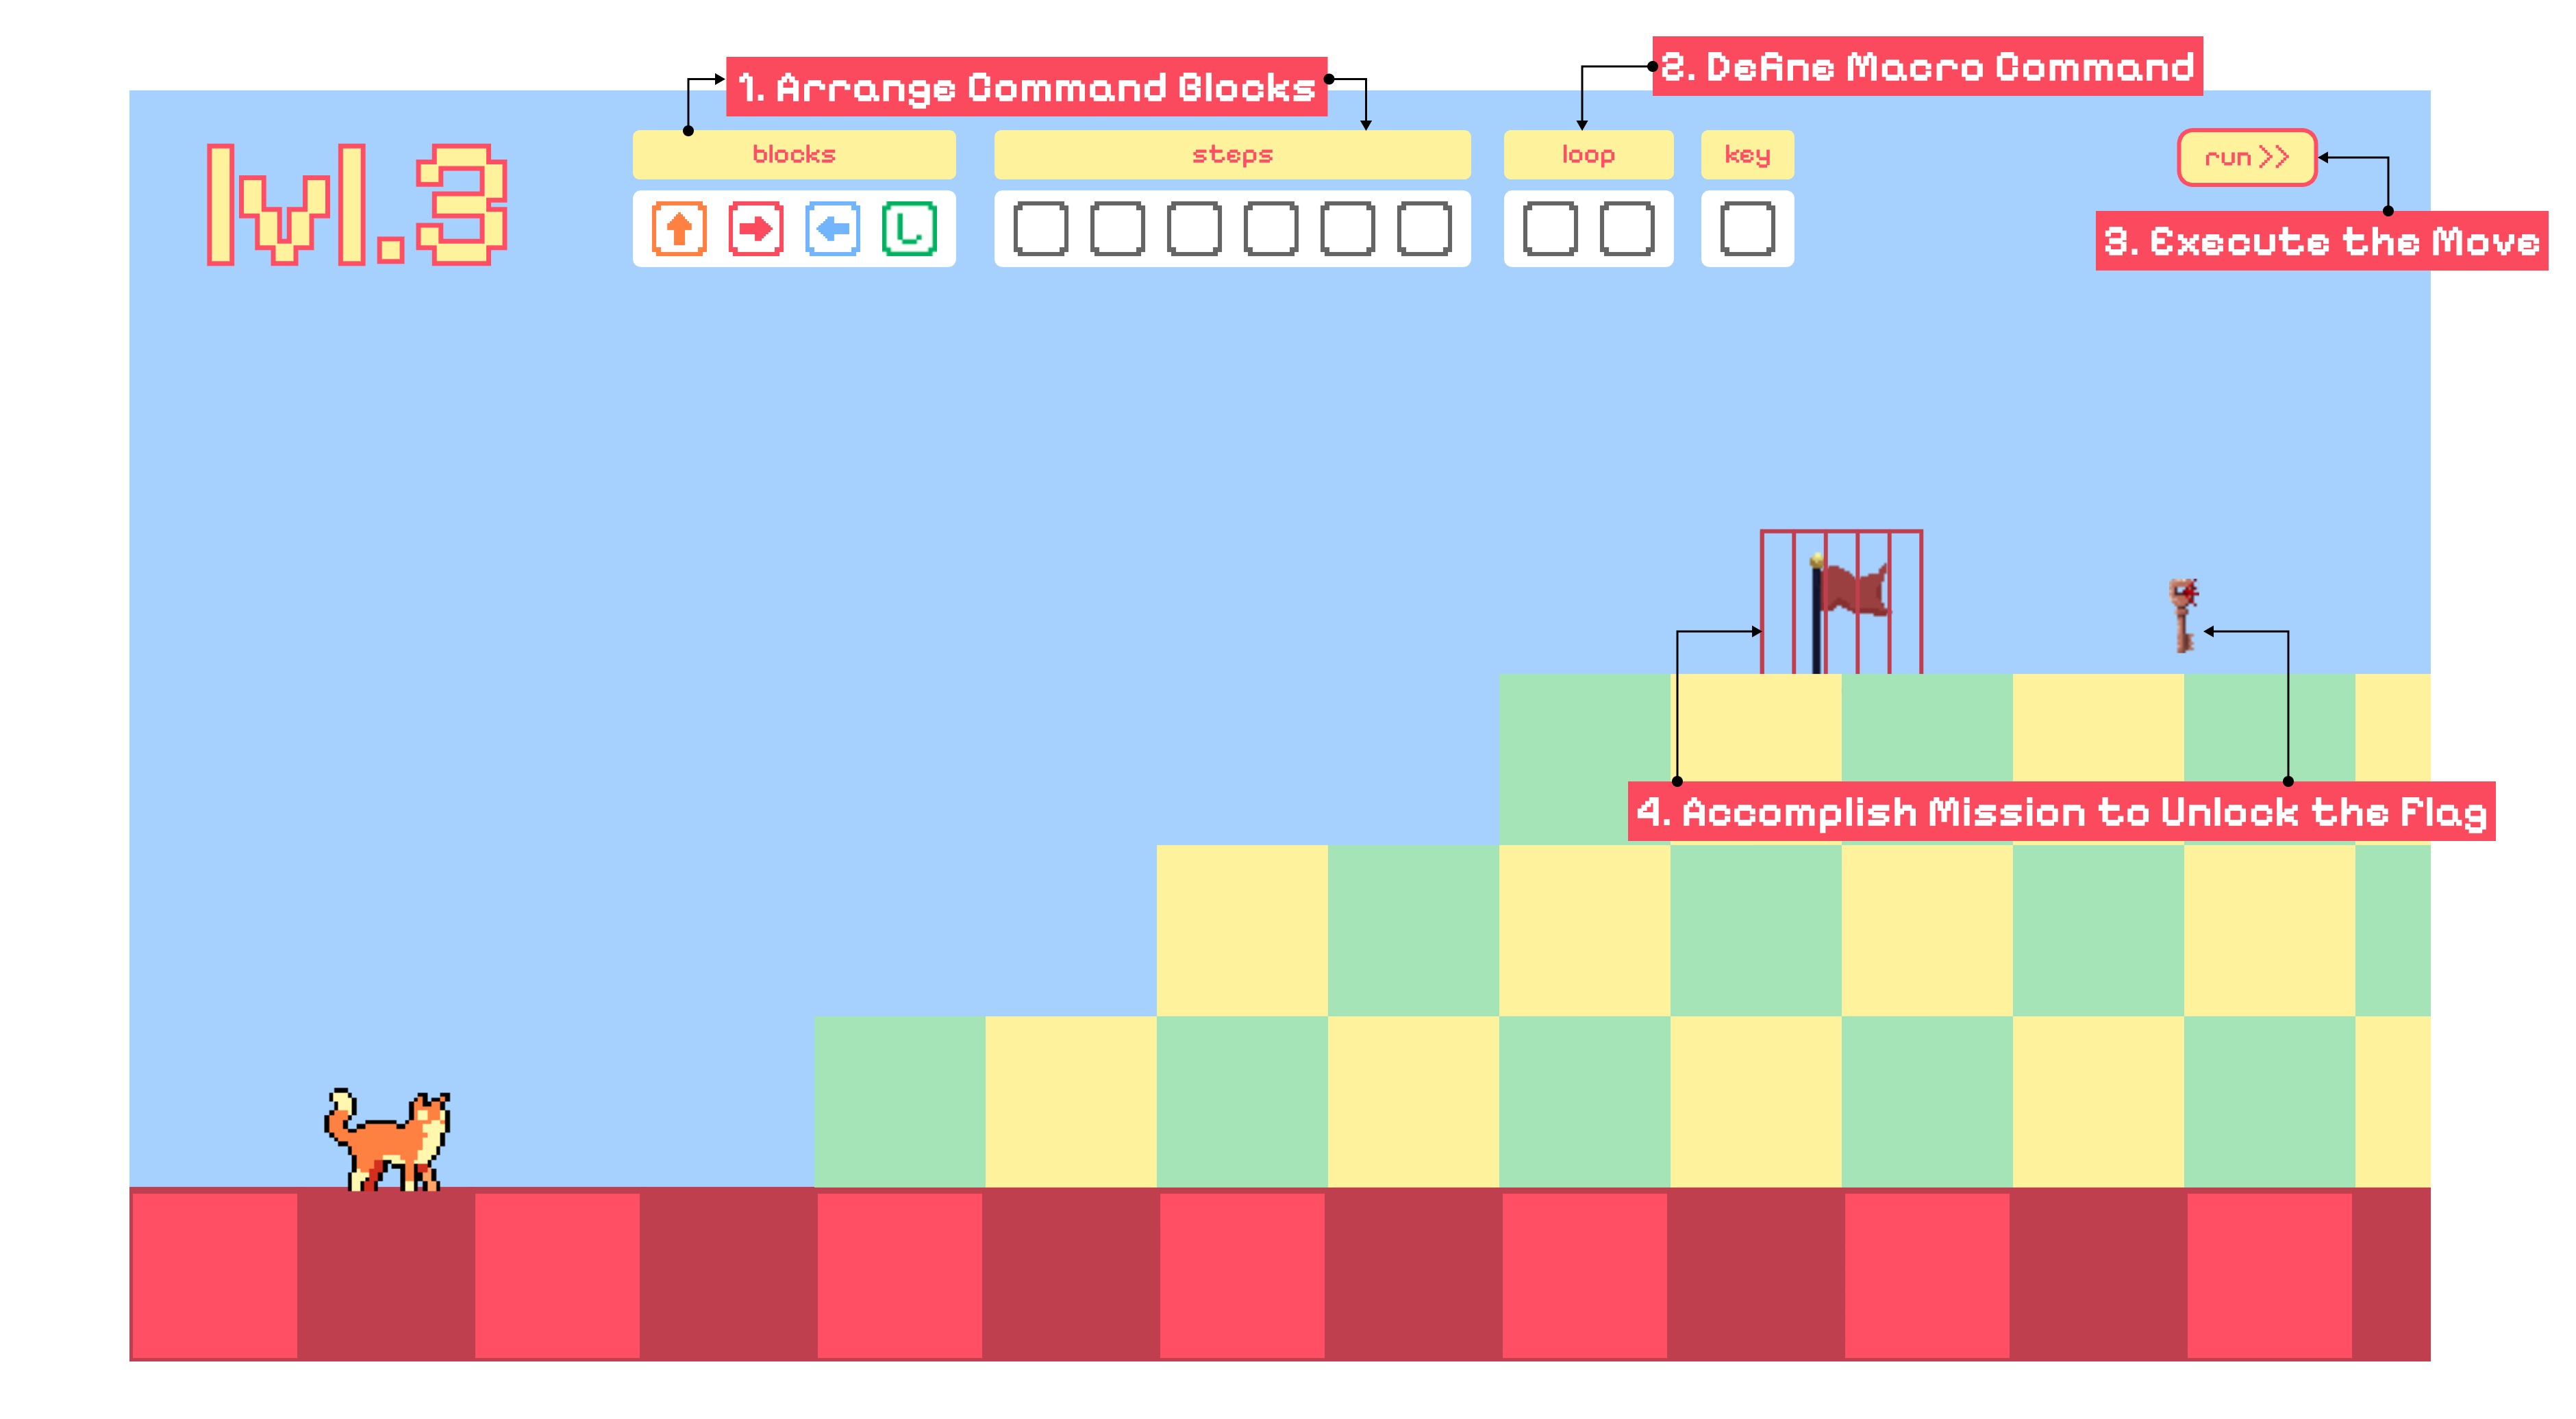
Figure 1. A snapshot of the game interface showing key UI components.
In this game, players must:
1. Select commands from the `blocks` panel — only these available blocks can be used.
2. Arrange the selected blocks into a sequence using the `steps` panel.
3. Define macro commands in the `loop` panel to optimize and reduce repetition.
4. Execute the move using the `run` button to guide the cat.
5. Collect keys and reach the flag to complete the level.
## ⚙️ Installing & Running The Game
To play the game, follow these steps:
1. Clone the repository
```bash
git clone https://github.com/nadiarvi/run-the-cat.git
```
2. Navigate to the project directory:
```bash
cd run-the-cat
```
3. Install dependencies and start the game:
```bash
npm install
npm run dev
```
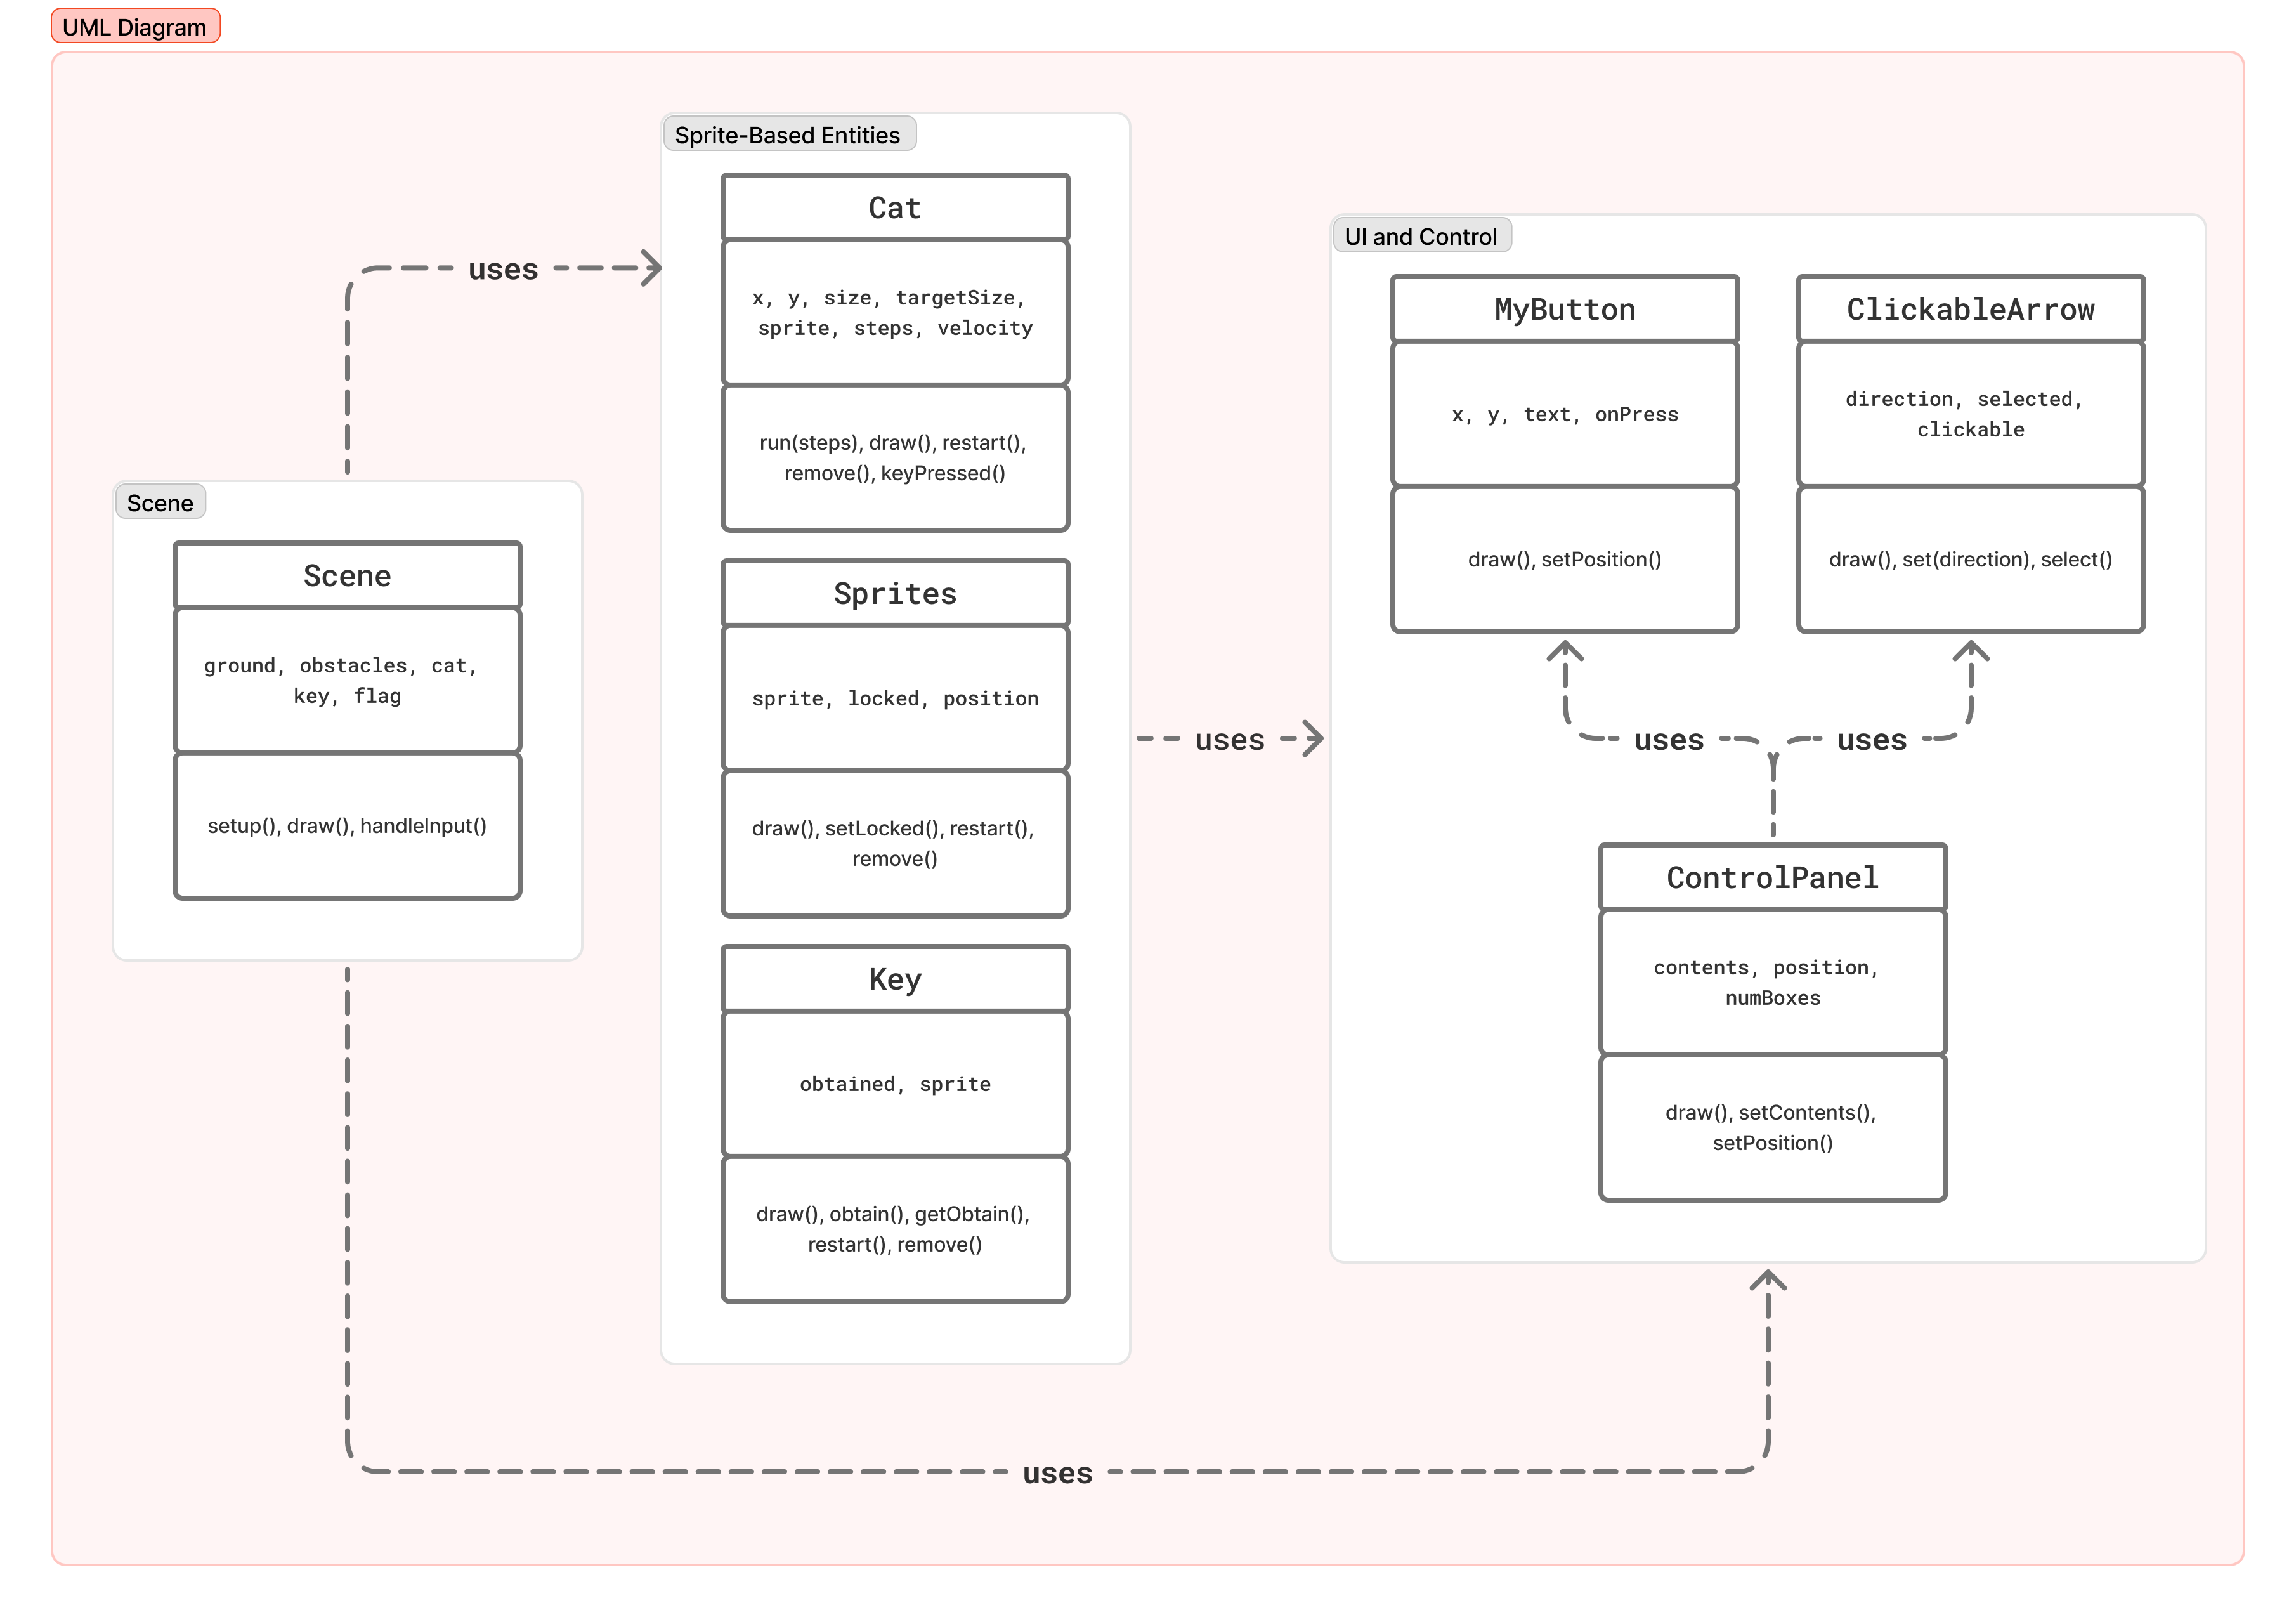
## 🔧 Code Structure